How to Use Nespresso Milk Frother – Step by Step

Are you a coffee lover who enjoys the creamy texture of frothed milk? If so, then a Nespresso Milk Frother is a must-have addition to your kitchen. In this article, we will guide you through the process of using a Nespresso Milk Frother step by step, ensuring that you achieve the perfect frothed milk for your favorite coffee drinks.
Contents
- 1 What is a Nespresso Milk Frother?
- 2 How to Use a Nespresso Milk Frother
- 3 Cleaning and Maintenance
- 4 Tips and Tricks for Frothing Milk
- 5 Common Issues and Troubleshooting
- 6 Alternative Milk Options for Frothing
- 7 Conclusion
- 8 Frequently Asked Questions
- 9 What are the different types of Nespresso frothers?
- 10 How does the Nespresso milk frother work?
- 11 What is the best type of milk to use with a Nespresso frother?
- 12 How do I clean a Nespresso milk frother?
- 13 How do I make hot milk froth with a Nespresso frother?
What is a Nespresso Milk Frother?
Overview
A Nespresso Milk Frother is a device designed to create perfectly frothed milk for your coffee beverages. It is a handy tool that can turn cold milk into creamy foam, perfect for lattes, cappuccinos, and other specialty coffee concoctions.

Benefits of Using a Nespresso Milk Frother
Using a Nespresso Milk Frother has several advantages. First and foremost, it allows you to create barista-quality frothed milk at home, giving your coffee a professional touch. Additionally, it saves you time and effort compared to manually frothing milk. The Nespresso Milk Frother is also easy to use and clean, making it a convenient choice for coffee enthusiasts.
Types of Nespresso Milk Frothers
Nespresso offers different types of milk frothers to suit various needs. The popular choices include the Aeroccino 3 and the Aeroccino 4. Both models are designed to provide excellent milk froth, but the Aeroccino 4 has additional features, such as the ability to froth cold milk and an option for hot chocolate preparation.
How to Use a Nespresso Milk Frother
Step 1:Choose Steamed or Frothed Milk
When it comes to making espresso-based drinks, the choice between steamed or frothed milk is an important one. It all depends on the type of drink you want to create. If you’re looking for a cappuccino with that signature cloud-like milk foam, then frothing is the way to go. Frothed milk creates a creamy texture and adds a touch of elegance to your cappuccino. On the other hand, if you’re craving a latte, then steamed milk is the way to go. Steamed milk gives your latte a smooth and velvety texture, allowing the full flavor of the espresso to shine through. However, it’s important to note that many people can get confused by the Aeroccino whisk and its different use cases. To achieve the perfect frothed milk for a cappuccino, be sure to leave the coil ring around the whisk. This will ensure that the milk is aerated and frothed to perfection. If you’re aiming for steamed milk for a latte, make sure to remove the coil ring to allow the milk to steam and create that creamy texture. So, whether you’re in the mood for a foamy cappuccino or a silky latte, choosing between steamed or frothed milk is the first step to use nespresso milk frother.
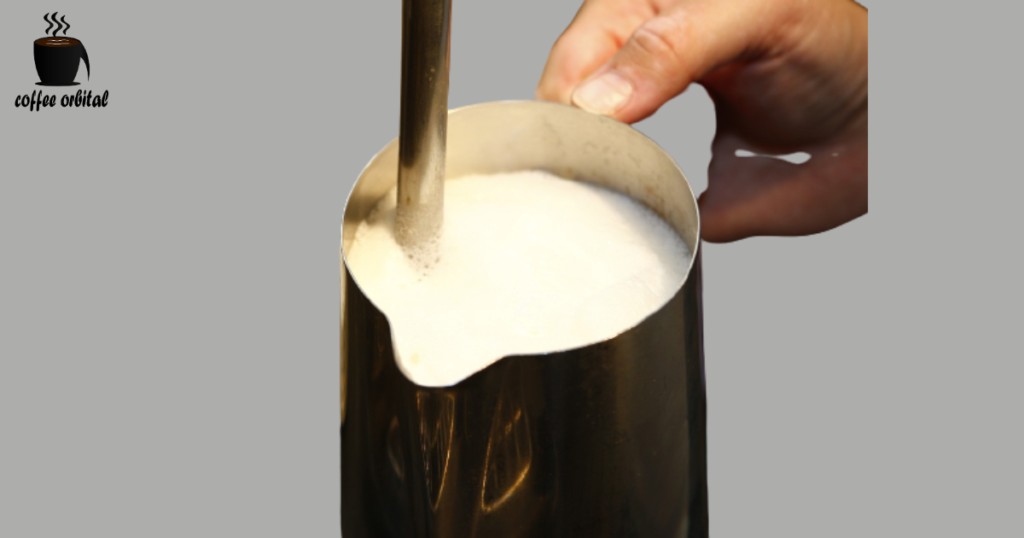
Step 2: Add Your Fresh Milk
Step 2 of the process involves adding fresh milk to the container. To do this, you should first determine the desired level of milk you want to add. The container typically comes with two max lines, one higher and one lower. If you are planning to use the coil ring to froth the milk, it is important to never fill the container above the lower max line. This is because the frothing process can cause the milk to expand and overflow if it is filled beyond this point. On the other hand, if you are not using the ring, you have the flexibility to fill the container to either the higher or lower max line. The line you choose depends on factors such as the size or number of drinks you are making, as well as your personal preference for the amount of milk you want to use.
By carefully considering the specific requirements of your preferred method, you can ensure that you add the appropriate amount of fresh milk to the container for optimal results. It is important to note that adding too much milk can lead to spills or splashes during the frothing process, while adding too little may result in insufficient froth. Therefore, it is essential to follow the guidelines provided by the manufacturer and to experiment with different milk levels to find the perfect balance that suits your taste and desired drink consistency. Taking the time to add the right amount of fresh milk at this stage will contribute to the overall success and enjoyment of using your milk frother.
Step 3: Choose The Temperature
In step 3 of using the Aeroccino 3, you have the option to choose the temperature of your milk froth. This versatile device allows you to prepare froth that is either hot or cold, depending on your preference. To achieve hot froth, all you need to do is press the button once and let the Aeroccino 3 do its magic. Within seconds, you will have a steaming cup of frothy goodness. On the other hand, if you desire a refreshing cold froth, simply press the button twice within 2 seconds. The process is quick and convenient, ensuring you can enjoy your favorite cold beverages in no time. To let you know what temperature the frother is working at, the Aeroccino 3 has a light indicator. When making hot froth, the light will be red, providing a visual cue. Conversely, when making cold froth, the light will turn blue. This simple yet effective feature allows you to easily distinguish between the two temperature options. So whether it’s a hot cappuccino or an iced latte, the Aeroccino 3 has got you covered. Just press once for hot froth or press twice for cold froth, and enjoy your perfectly prepared beverages.
4. Combine Milk and Espresso
To create a delicious milk and espresso beverage, start by using your Nespresso machine to prepare either an espresso or a double espresso. While the machine is working its magic, you can simultaneously use the frother to heat and froth your milk. In my experience, dark roast pods with a higher intensity level tend to work exceptionally well with milk-based drinks. However, Nespresso also has specific recommendations for pods that are perfect for pairing with milk, such as the Vertuo Bianco Leggero. Once your espresso is ready, pour the milk into the espresso from a jug to create either a cappuccino or a classic caffe latte. By combining the rich flavors of milk and espresso, you can enjoy a robust and creamy coffee experience.
Cleaning and Maintenance
After using the Nespresso Milk Frother, it is essential to clean it properly to maintain its performance and longevity. Make sure to detach the whisk from the jug and rinse them with warm water. Avoid using abrasive cleaners or scrubbers, as they can damage the frother. Additionally, wipe the base of the frother with a damp cloth.
Tips and Tricks for Frothing Milk
Best Type of Milk to Use
When it comes to frothing milk, the type of milk you use can significantly impact the result. Whole milk is generally the best choice for creating a creamy and rich foam. However, if you prefer a lighter froth, skim milk can be used. Experiment with different types of milk to find your preferred flavor and texture.
Creating Different Types of Milk Froth
The Nespresso Milk Frother allows you to create various types of milk froth, including hot milk foam, cold foam, and steamed milk. Adjust the frother settings to achieve your desired texture. For hot froth, ensure that the milk is cold before frothing. For cold foam, froth the milk directly without heating it. To prepare steamed milk, heat the frothed milk using the frother’s heat function.
Professional Techniques from Baristas
If you want to take your frothing skills to the next level, consider learning some professional techniques from baristas. They often create latte art, such as heart or leaf patterns, by pouring the frothed milk into the coffee in a specific manner. With practice, you can impress your friends and family with beautifully designed coffee drinks.
Common Issues and Troubleshooting
Frother Not Working Properly
If your Nespresso Milk Frother is not working properly, ensure that it is securely connected to the power source. Check if the whisk and jug are properly attached. If the frother still does not work, consult the user manual or contact Nespresso customer support for assistance.
Milk Froth Not Hot Enough
If you find that the milk froth is not hot enough, make sure that you are using cold milk before frothing. The Nespresso Milk Frother heats the milk during the frothing process. Also, ensure that the frother is functioning correctly and that the selected temperature setting is appropriate.
Getting Cold Froth Instead of Hot Froth
If you are getting cold froth instead of hot froth, check if the frother’s heat function is activated. Make sure that you have selected the correct temperature setting and that the frother is heating the milk during the frothing process.
Alternative Milk Options for Frothing
Using Non-Dairy Milk
If you follow a vegan or lactose-free diet, you can still enjoy frothed milk by using non-dairy alternatives. Options such as soy milk, almond milk, and oat milk can be frothed in the Nespresso Milk Frother. Each non-dairy milk may produce a slightly different result, so experiment to find your favorite.
Creating Latte and Cappuccino with Soy Milk
Soy milk is a popular choice among those who are lactose intolerant or prefer a plant-based option. It can be frothed in the Nespresso Milk Frother to create delicious lattes and cappuccinos with a creamy foam. Follow the same steps as using regular milk to froth soy milk in the frother.
Tips for Frothing Fresh Milk
If you have access to fresh milk, it can enhance the flavor and texture of your frothed milk. Fresh milk tends to produce a smoother foam due to its higher fat content. Froth the fresh milk in the Nespresso Milk Frother following the same steps as with regular milk, and enjoy a velvety coffee experience.
Conclusion
In conclusion, mastering how to use the Nespresso Milk Frother unlocks the art of creating barista-quality frothed milk at home. With its ease of use and versatility, you can now indulge in creamy coffee delights, whether it’s a velvety latte or a cloud-like cappuccino. Embrace the convenience and elevate your coffee game with the Nespresso Milk Frother – your key to coffee perfection without leaving the comfort of your home. Cheers to a world of delightful coffee moments!
Frequently Asked Questions
What are the different types of Nespresso frothers?
The main types of Nespresso frothers are: Aeroccino 3 Milk Frother, Nespresso Barista,and Electric Milk Frothers
How does the Nespresso milk frother work?
The Nespresso milk frother works by using a whisk to whip air into the milk, creating a creamy and frothy texture. It uses induction technology to heat the milk to the desired temperature while frothing it simultaneously.
What is the best type of milk to use with a Nespresso frother?
The best type of milk to use with a Nespresso frother is whole milk. Whole milk has a higher fat content, which helps to create a creamy and rich foam. However, you can also use other types of milk, such as low-fat or non-dairy alternatives, depending on your preferences.
How do I clean a Nespresso milk frother?
Cleaning a Nespresso milk frother is simple. After each use, rinse the frother jug and lid with warm water and wipe them dry. If necessary, use a non-abrasive sponge or cloth to remove any milk residue. Do not immerse the frother base in water. It is recommended to clean the frother regularly to maintain its performance.
How do I make hot milk froth with a Nespresso frother?
To make hot milk froth with a Nespresso frother, add milk to the jug, close the lid, place it on the base, and press the hot milk froth button. The frother will heat and froth the milk simultaneously for a perfect coffee topping
Recommended Reads
Best Coffee Maker Under $50: Top Picks for Affordable and Quality Brewing
Nespresso Aeroccino 3 vs 4: A Comprehensive Comparison
Troubleshooting Guide: Why is Your Nespresso Frother Blinking Red?
How to Fix thе Watеr Undеr Prеssurе Kеurig Error: A Comprеhеnsivе Guidе
Breville vs DeLonghi Nespresso Machines: A Comprehensive Comparison
The 10 Best Costco Coffees for Every Coffee Lover to Try in 2023